Installing a template is a very easy process. There are two ways that the installation process can be carried out.
The first step is to log in to your WordPress admin dashboard. then click on
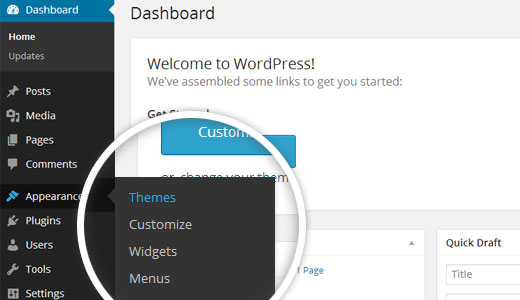
1. Select Appearance ---> Themes from the menu.
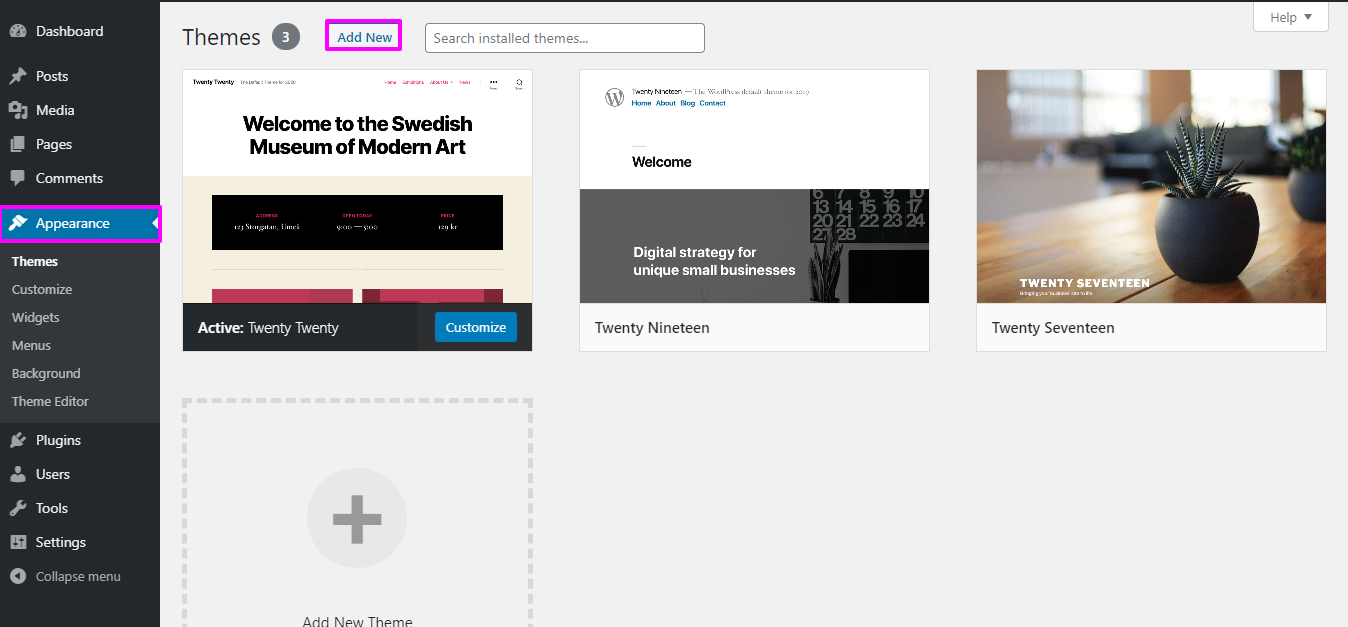
2. Click the Add New button at the top of the themes page after you've arrived there.
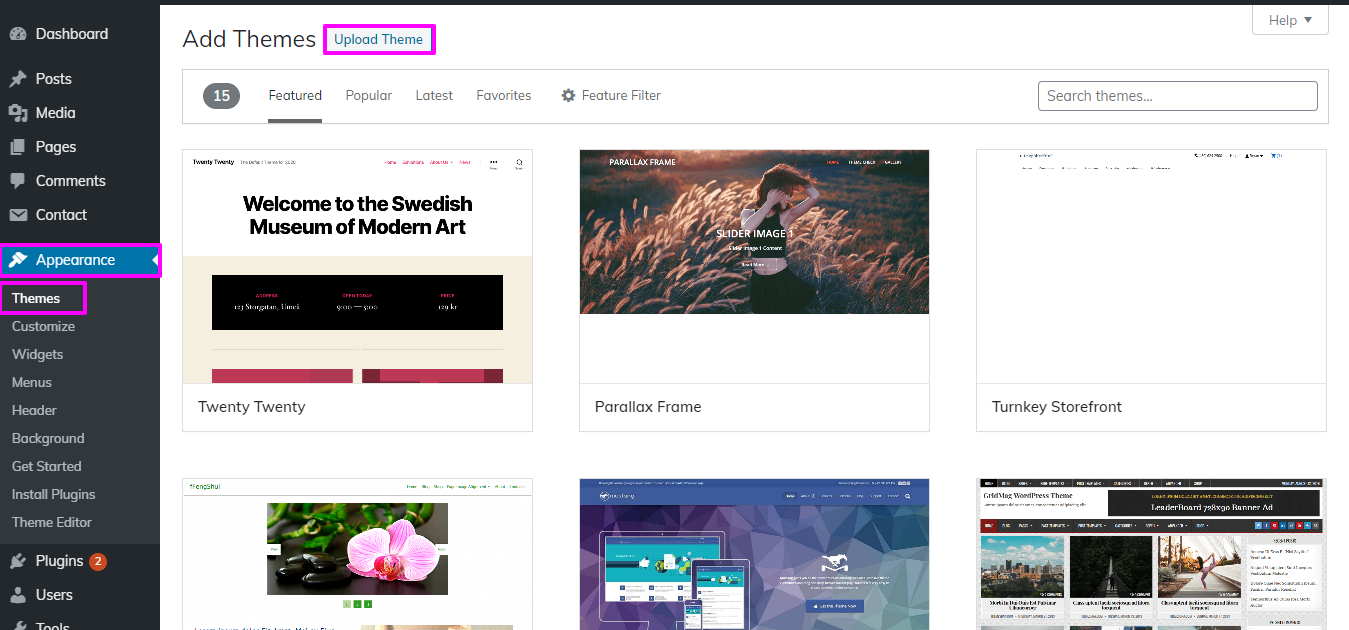
3. To upload a theme, click the button.
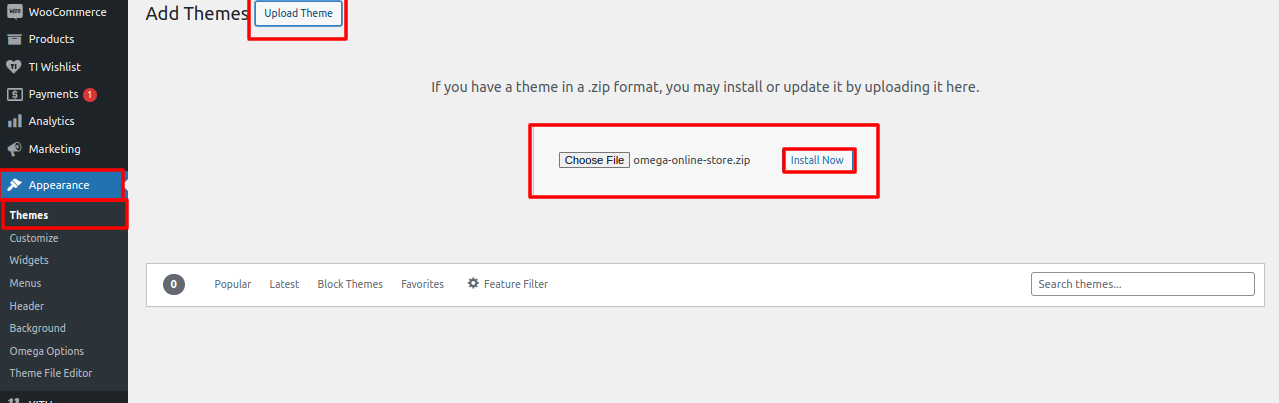
4. Select your omega-online-store.zip theme by clicking the Browse button, then click the Install Now button.
Congratulations! Your theme has been installed successfully.
The second installation option is to FTP-upload the theme. For the second option, first log into your website using FTP and navigate to the themes folder at wp-content. The theme you downloaded should be unzipped before being uploaded to your server.
After logging in, go to Appearance --->Themes and activate Total on your WordPress website.
Import sample content As just one click to set up your theme. You can follow the instructions in this article to build your website.
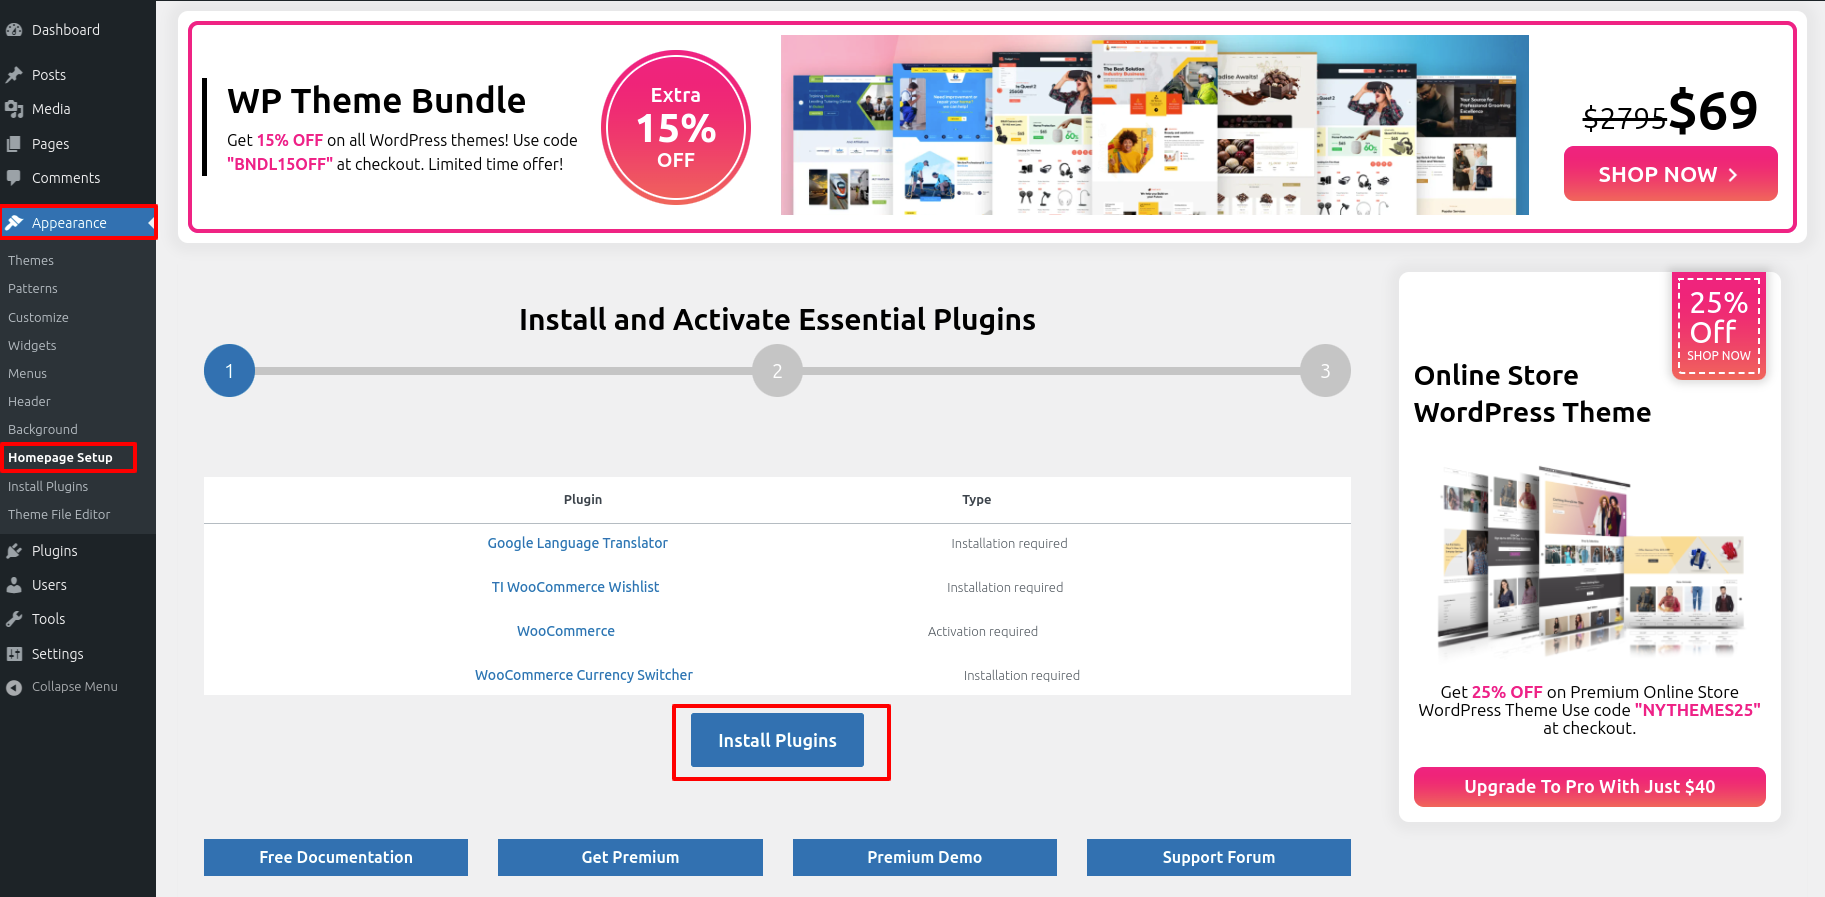
Access the Homepage Setup by Start the Dashbord---> Appearance -->Homepage Setup---> an click on Install Plugins.
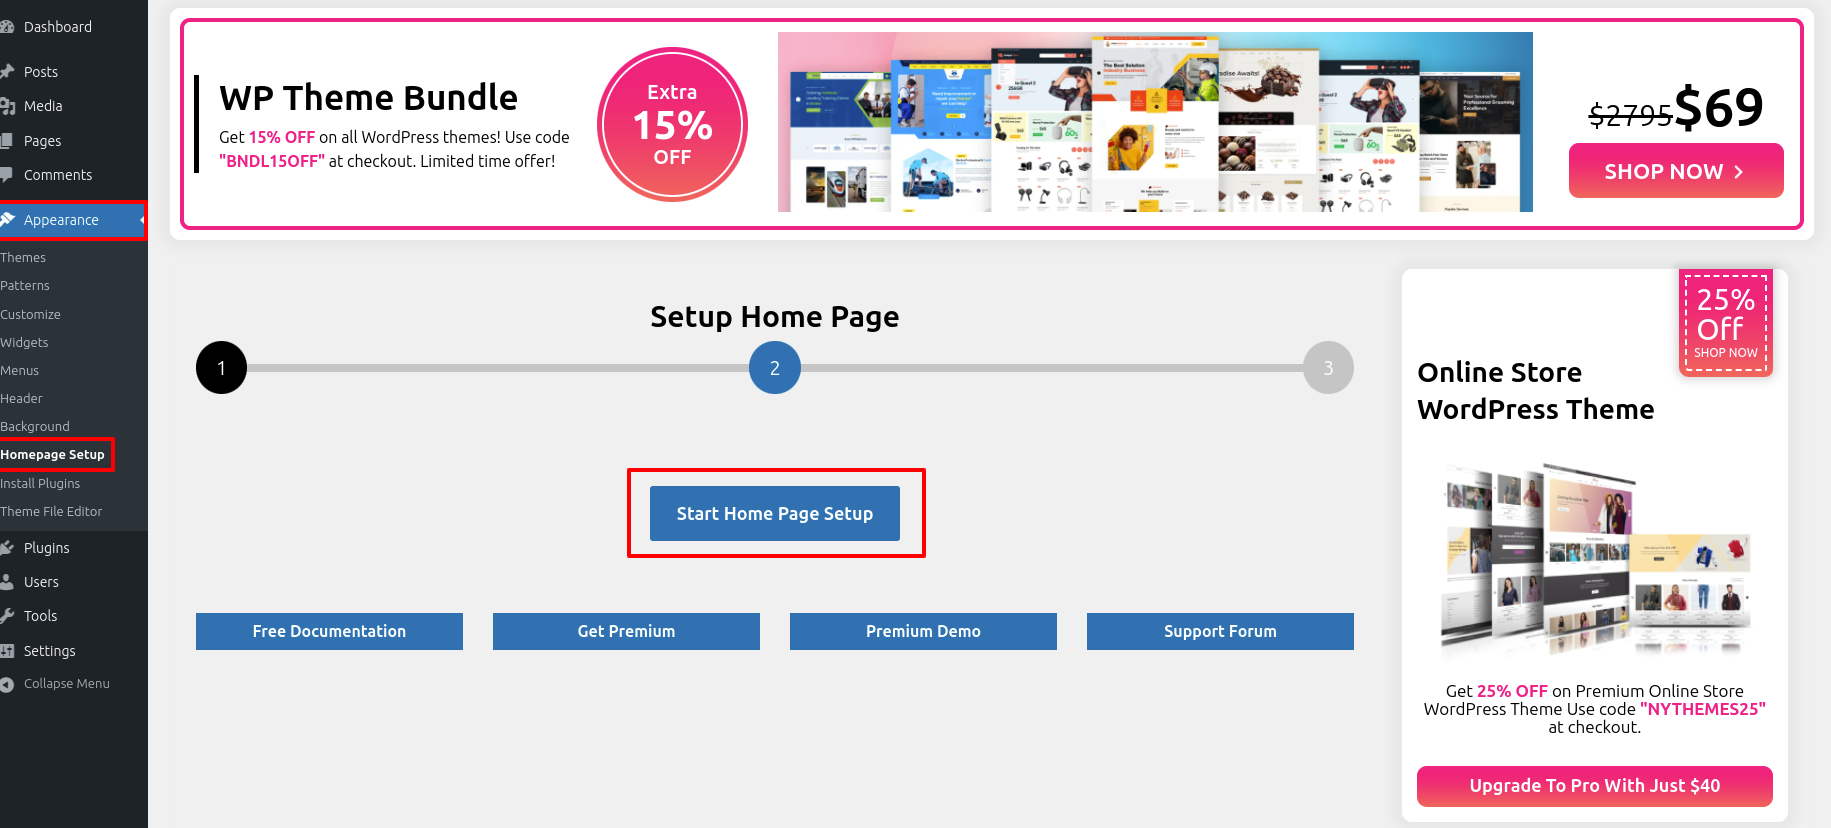
Access the Homepage Setup by Start the Dashbord---> Appearance -->Homepage Setup---> an click on Start Home Page Setup.
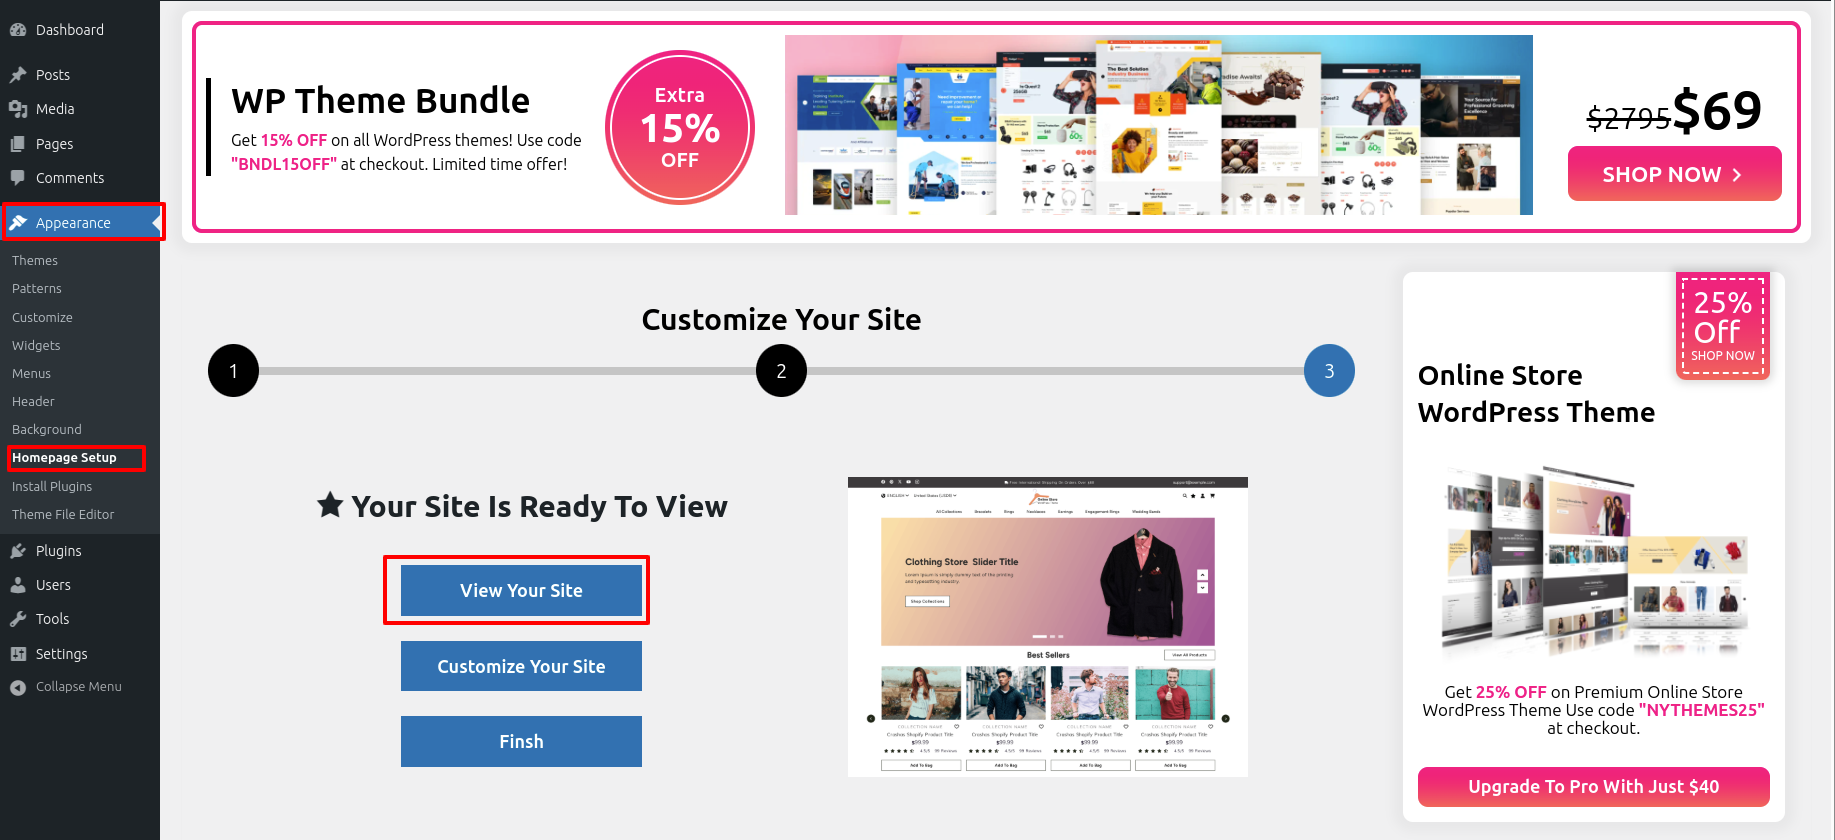
Access the Homepage Setup by Start the Dashbord---> Appearance -->Homepage Setup---> an click on View Your Site.
This is exactly how it will initially seem.

activate the install button afterwards clicking it.
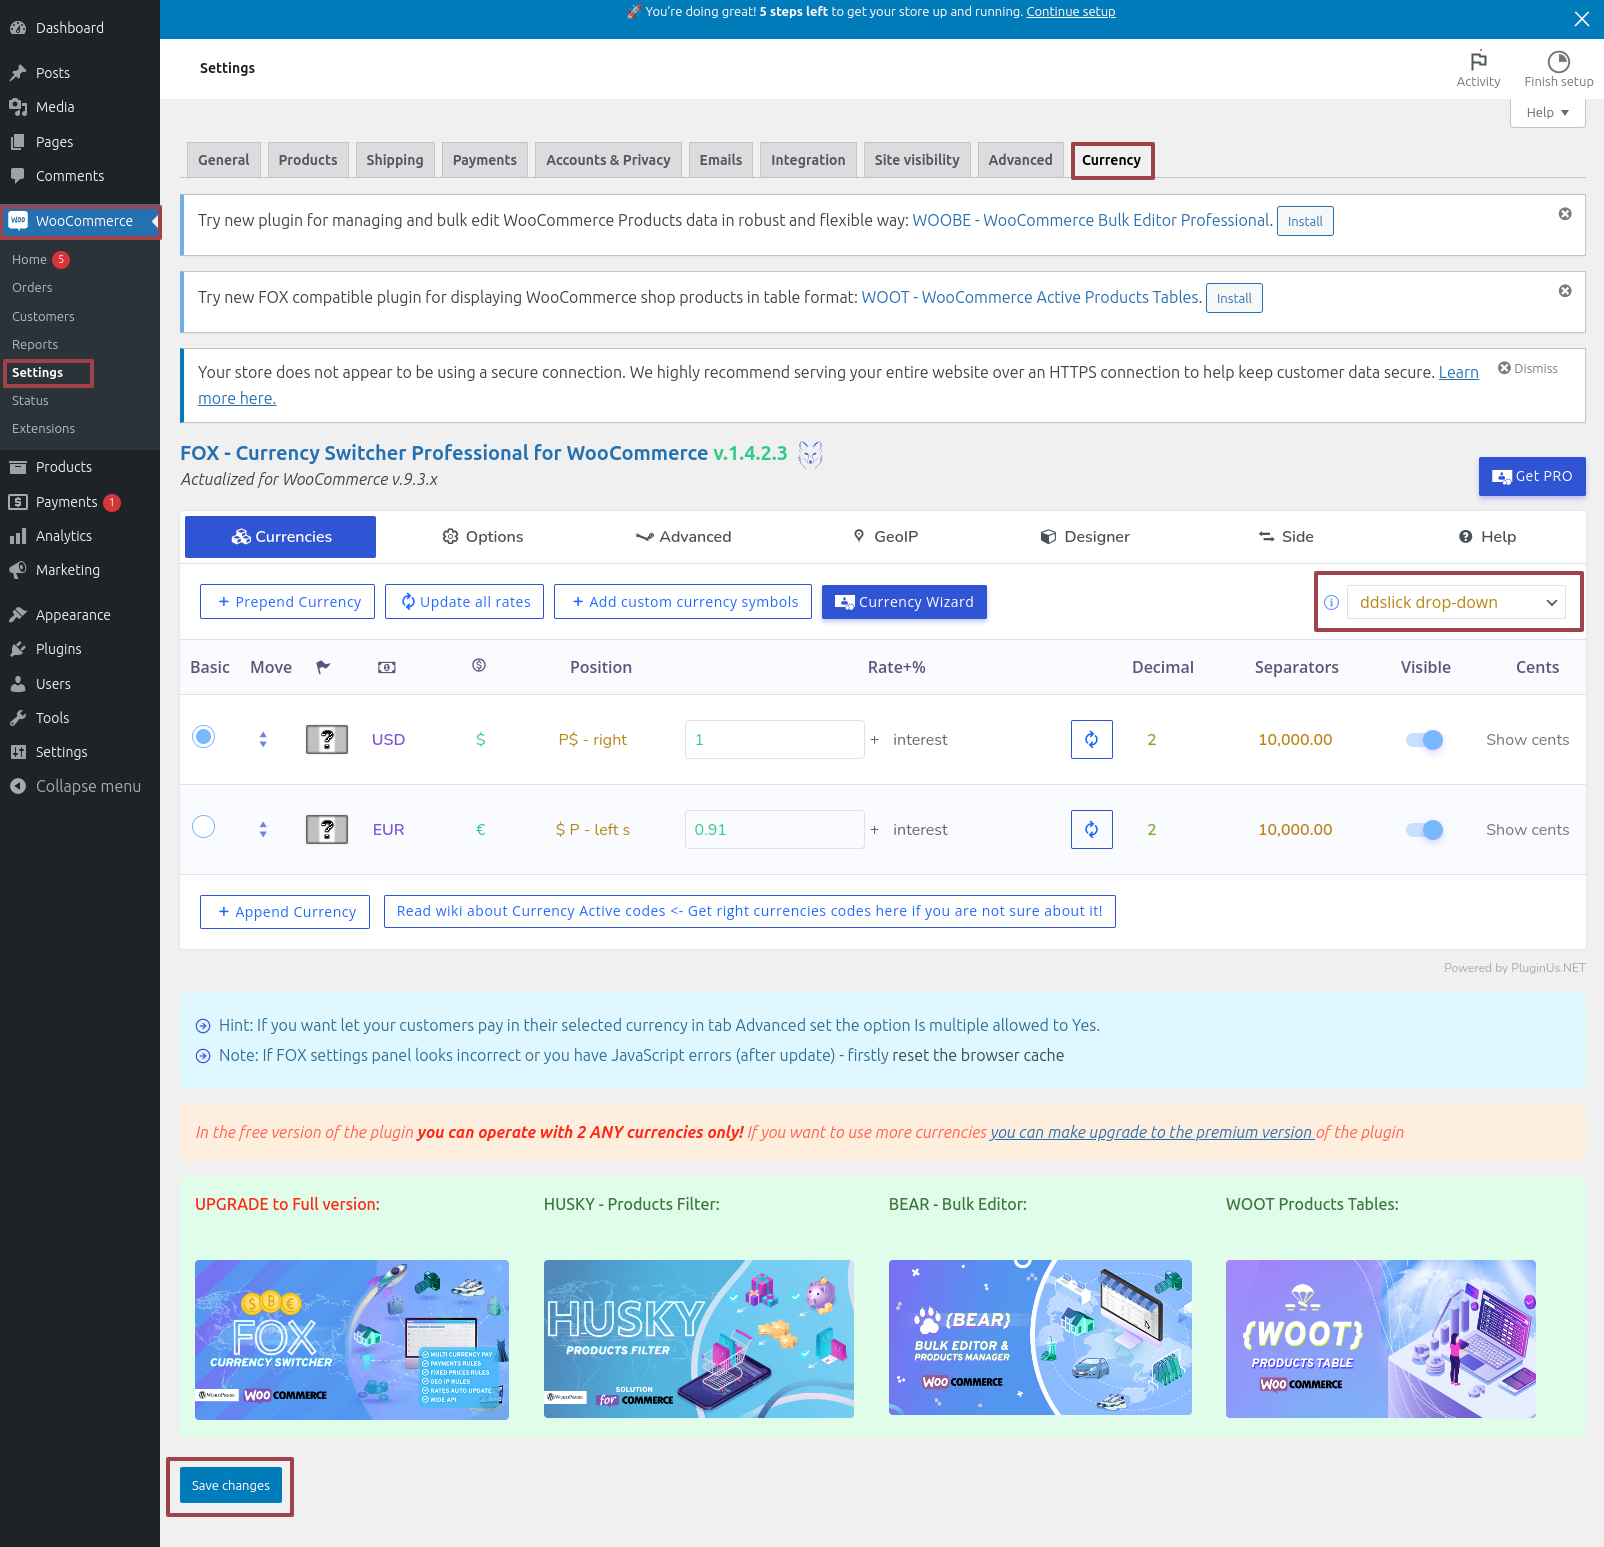
The WooCommerce Currency Switcher will be set up according to the guidelines provided below.
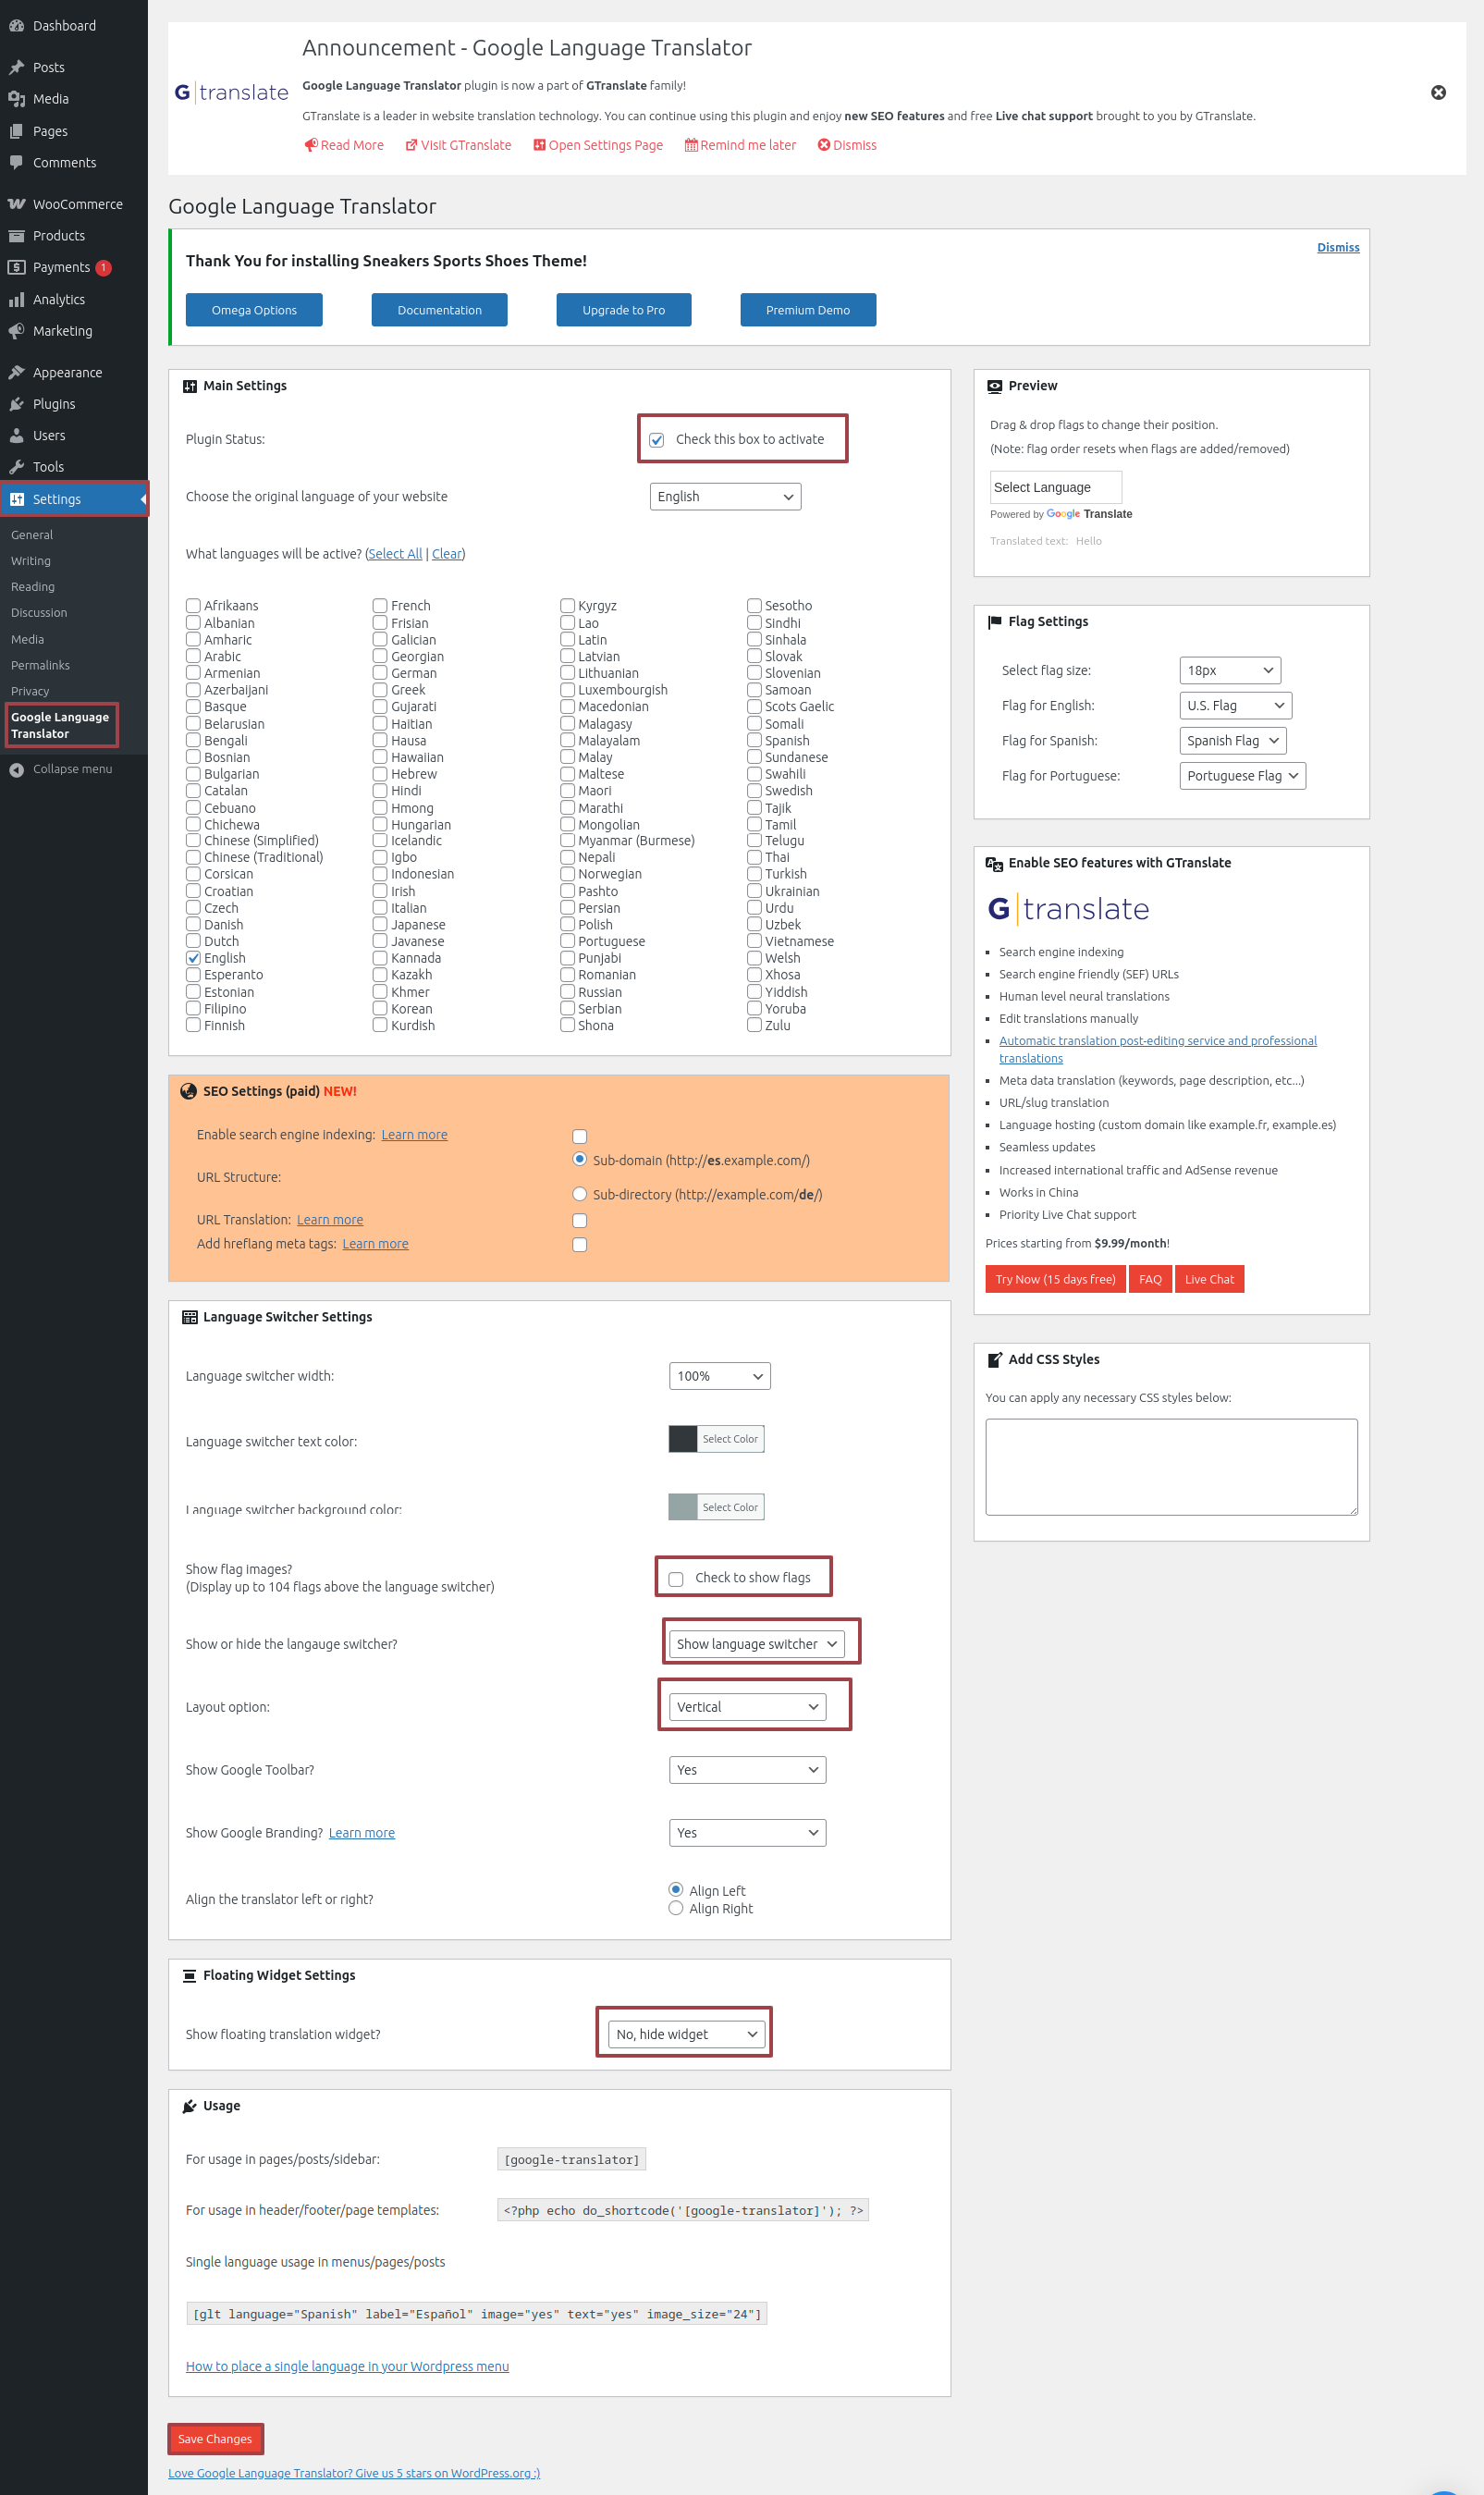
The Google Language Translator will be set up according to the guidelines provided below.
It will look like this in the Header Section.

You can look at the screenshots to get a better understanding.
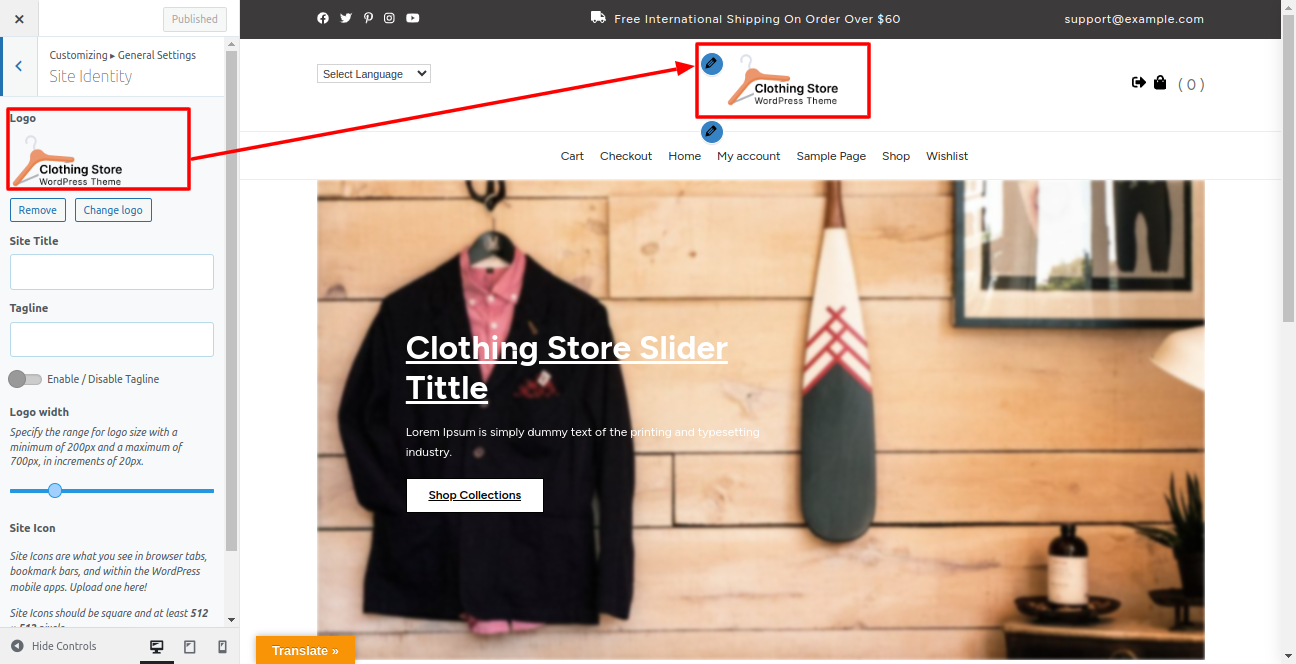
With respect to Site Identity,
Select Appearance---> Customize--> Genral Settings-->Site Identity.
With Header as the starting point,
Access the Header option and Header settings by going to Appearance---> Customize---> Theme Options--->Header Settings.
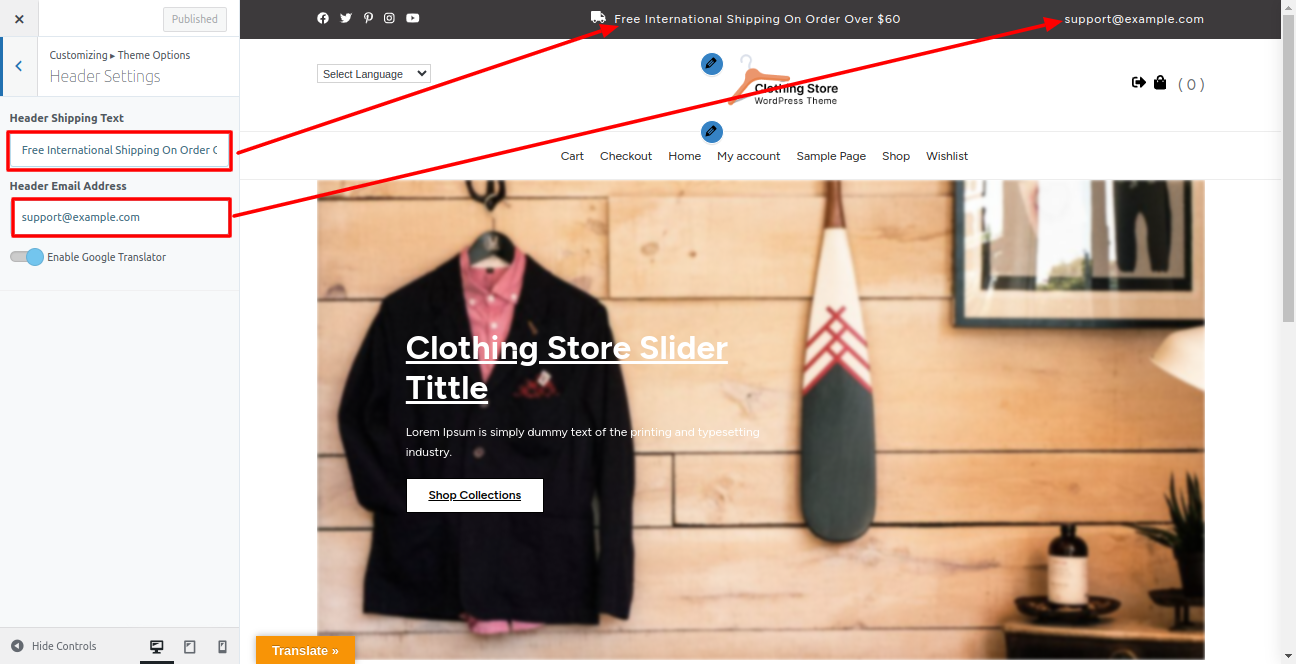
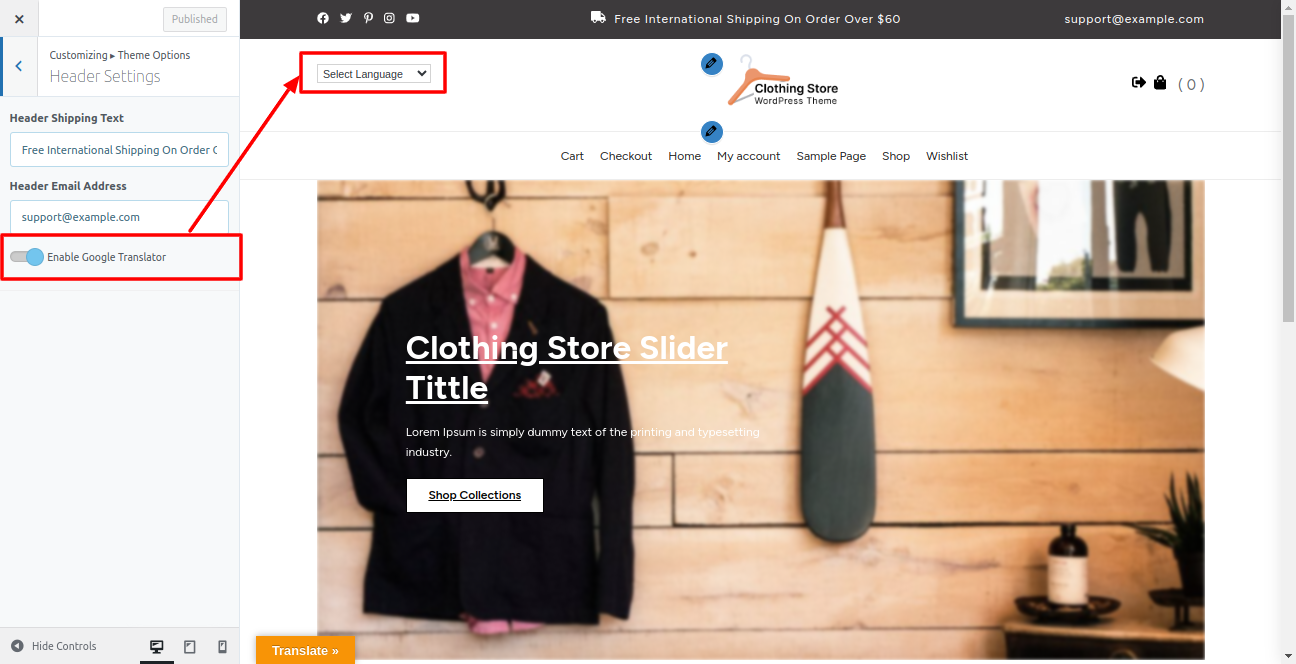
It will look like this in the Header Section.
To be able to begin with Social Icons Section,
Access the following menus: Appearance--->Customizing---> Theme Option---> Social Media Settings
This is how it will initially seem.

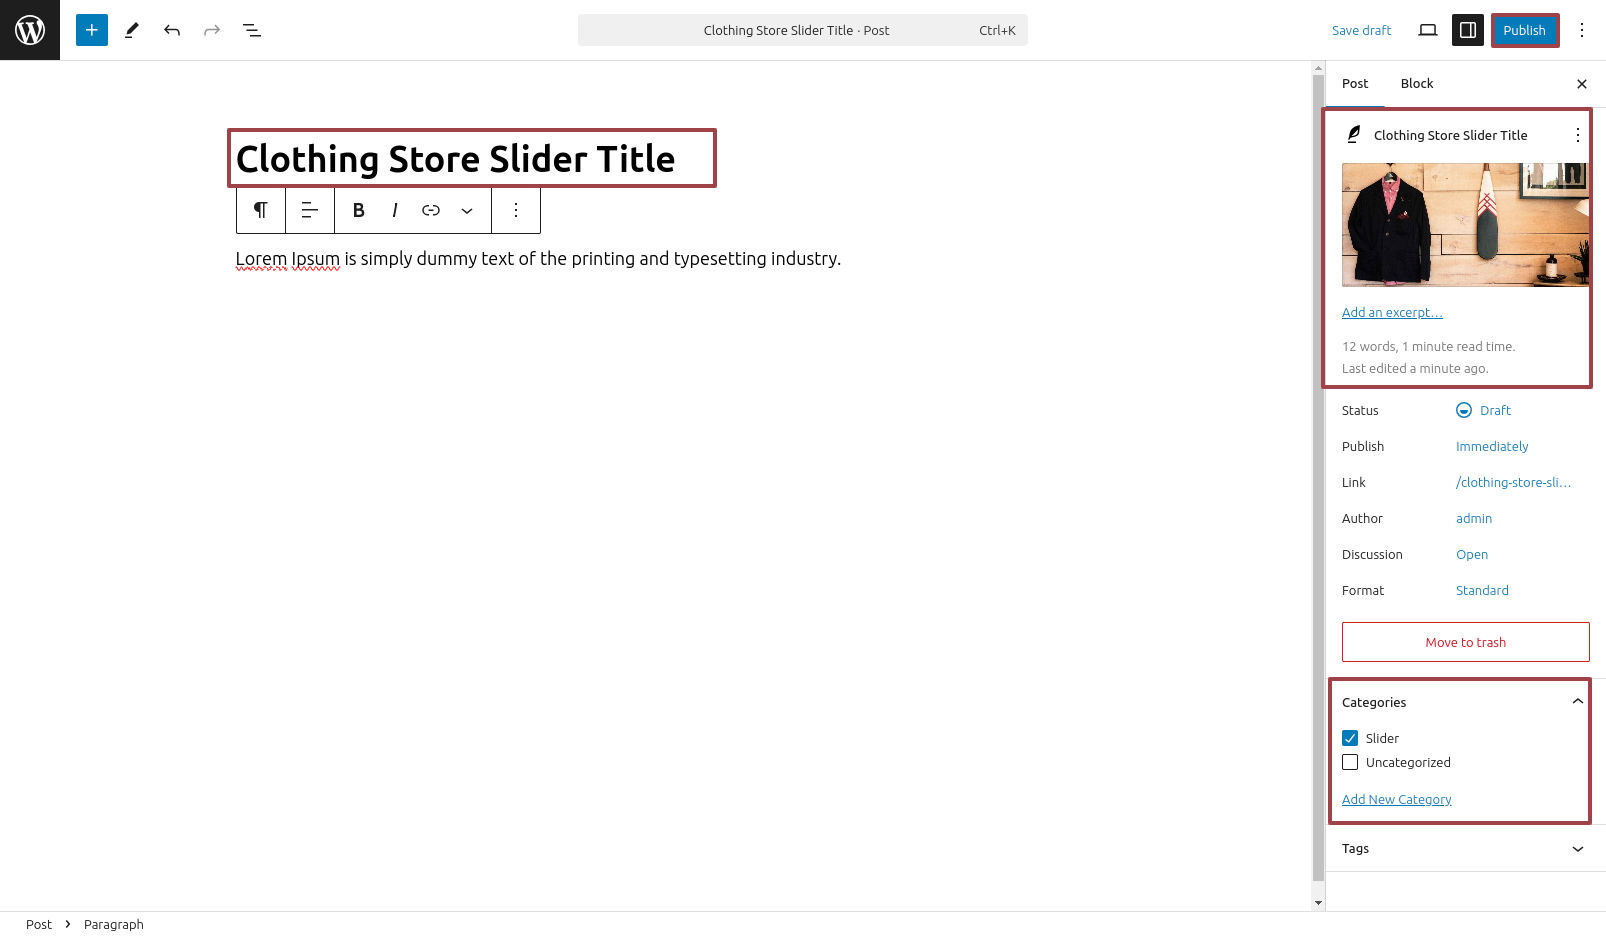
Starting with the slider Banner Section
Get started by going to Dashboard--->Posts--->Add New .
Access the following menus: Appearance---> Customize---> Frontpage Settings ---> Slider Settings.
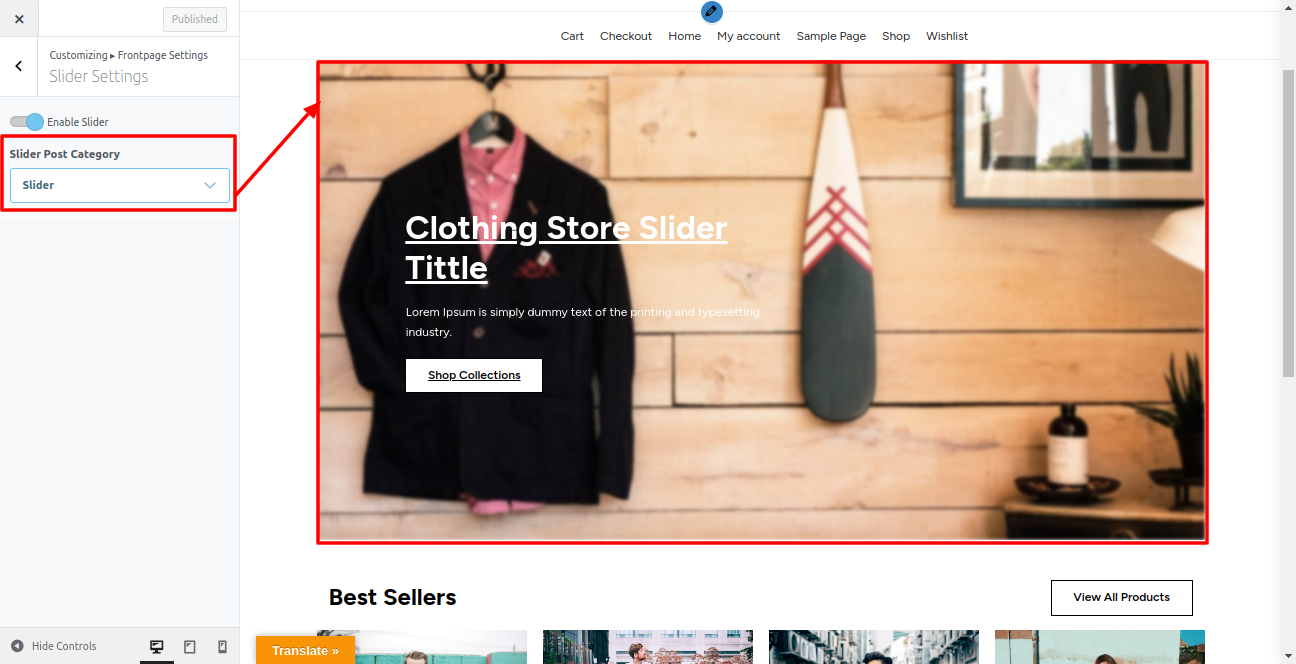
This is how it will initially seem.

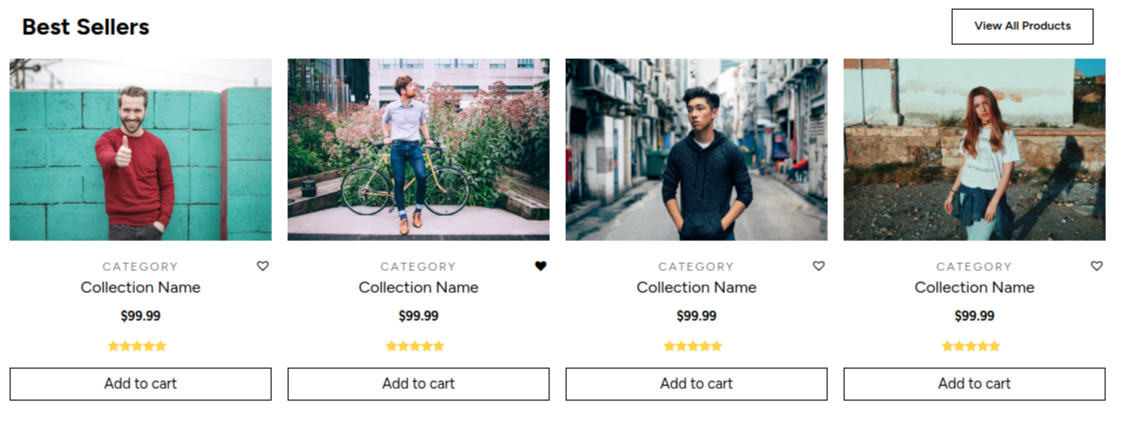
Beginning with Product Section
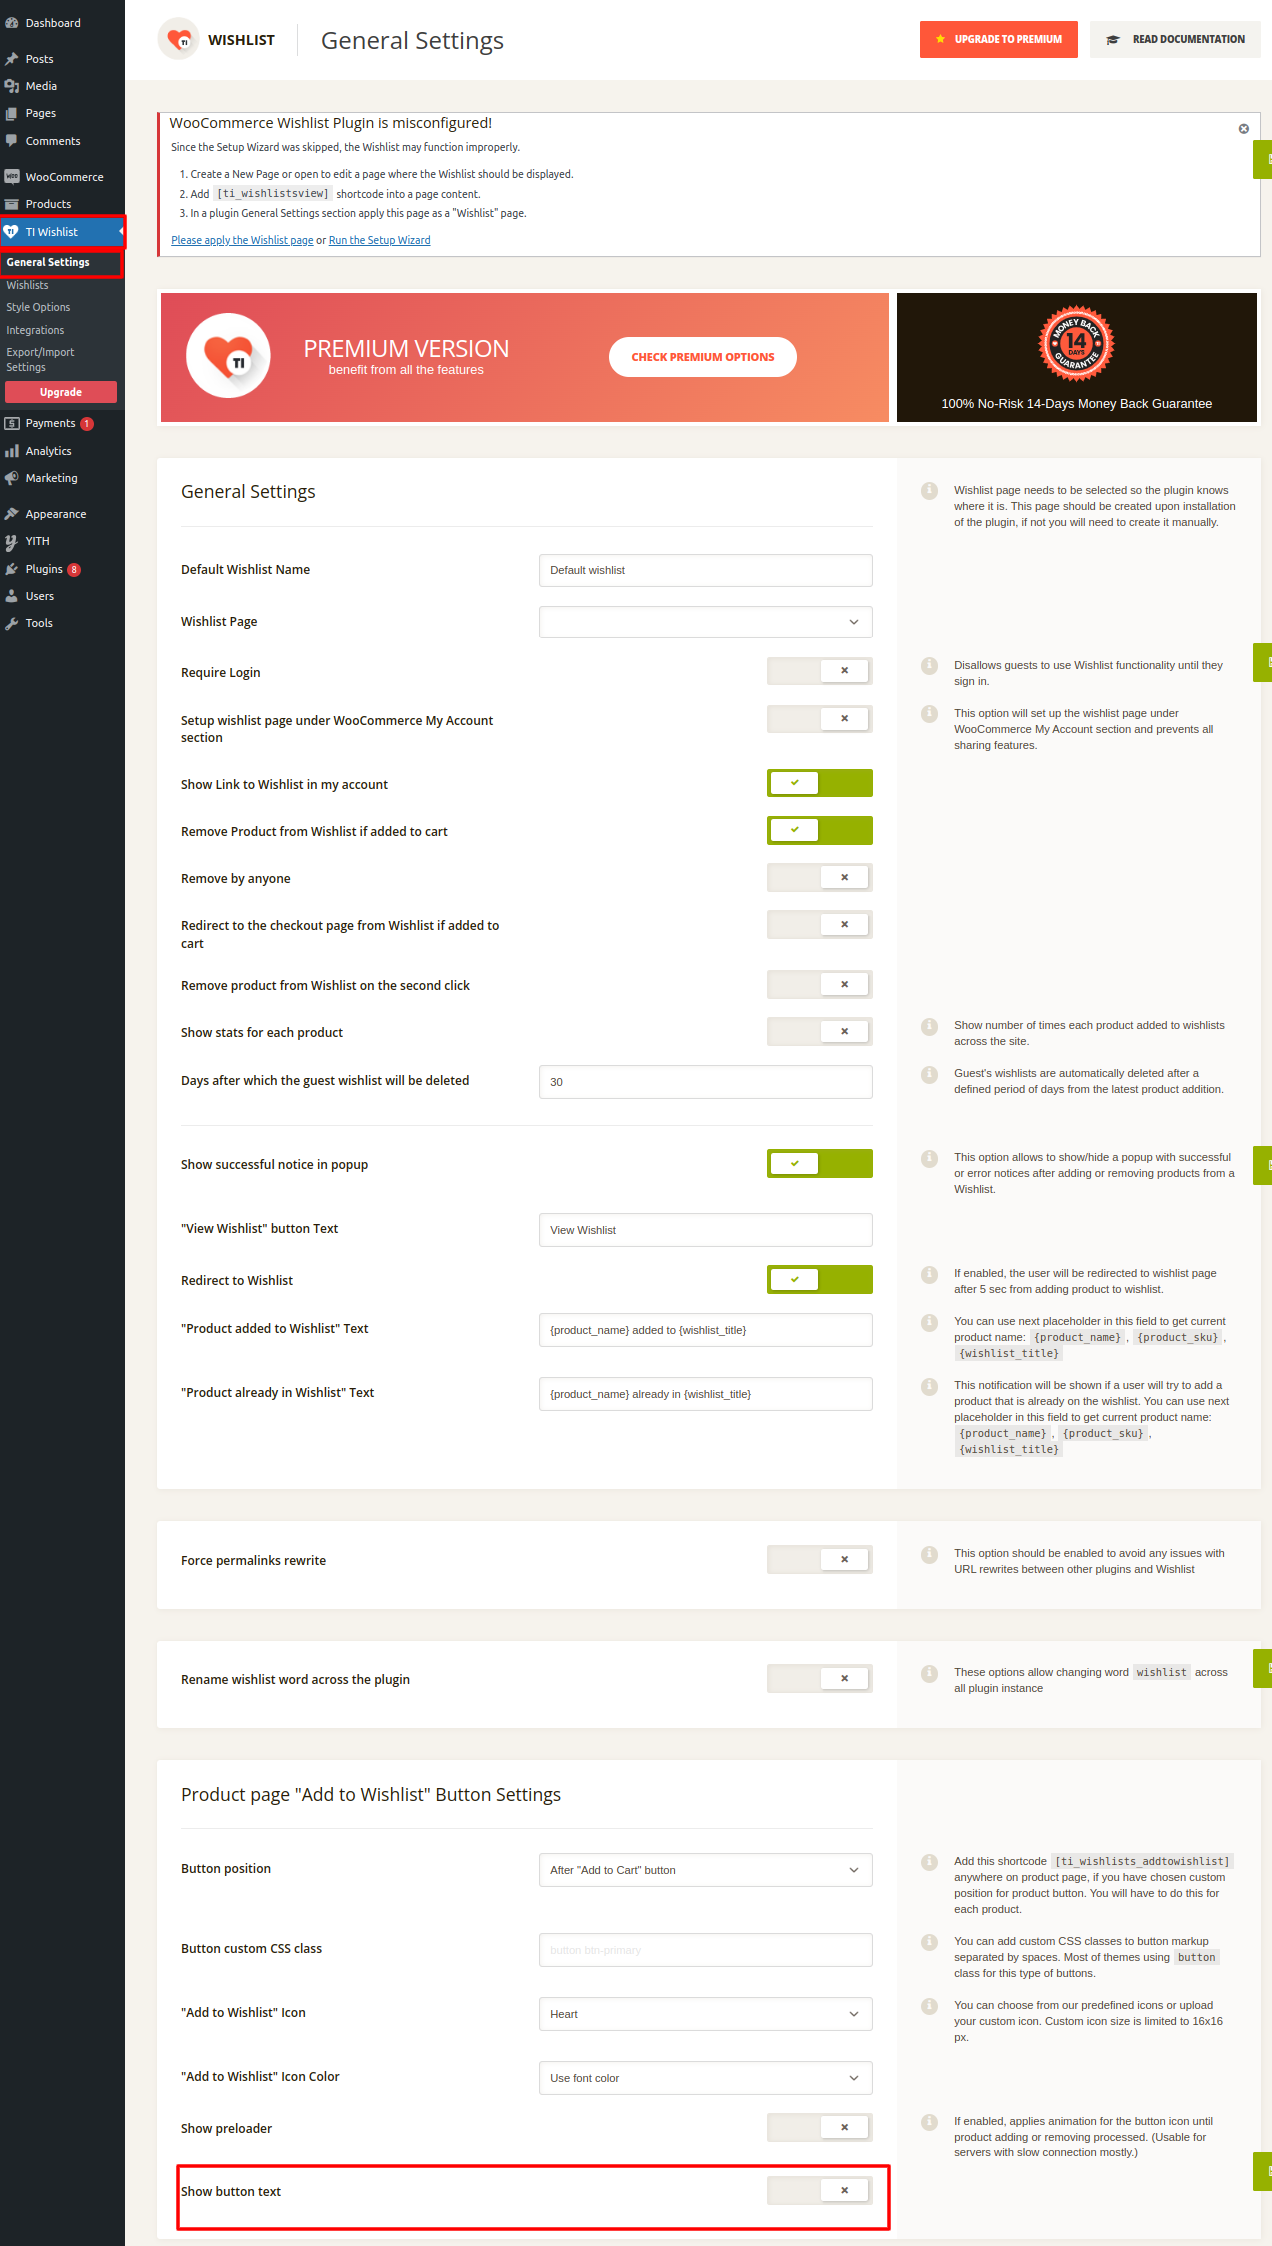
To add wishlist in product Section You have to Install the TI WooCommerce Wishlist Plugin.
Afer Installing TI Whislist appear on dashboard.
And Off the button text as shown below.
Get started by going to Dashboard--->Products--->Add New .
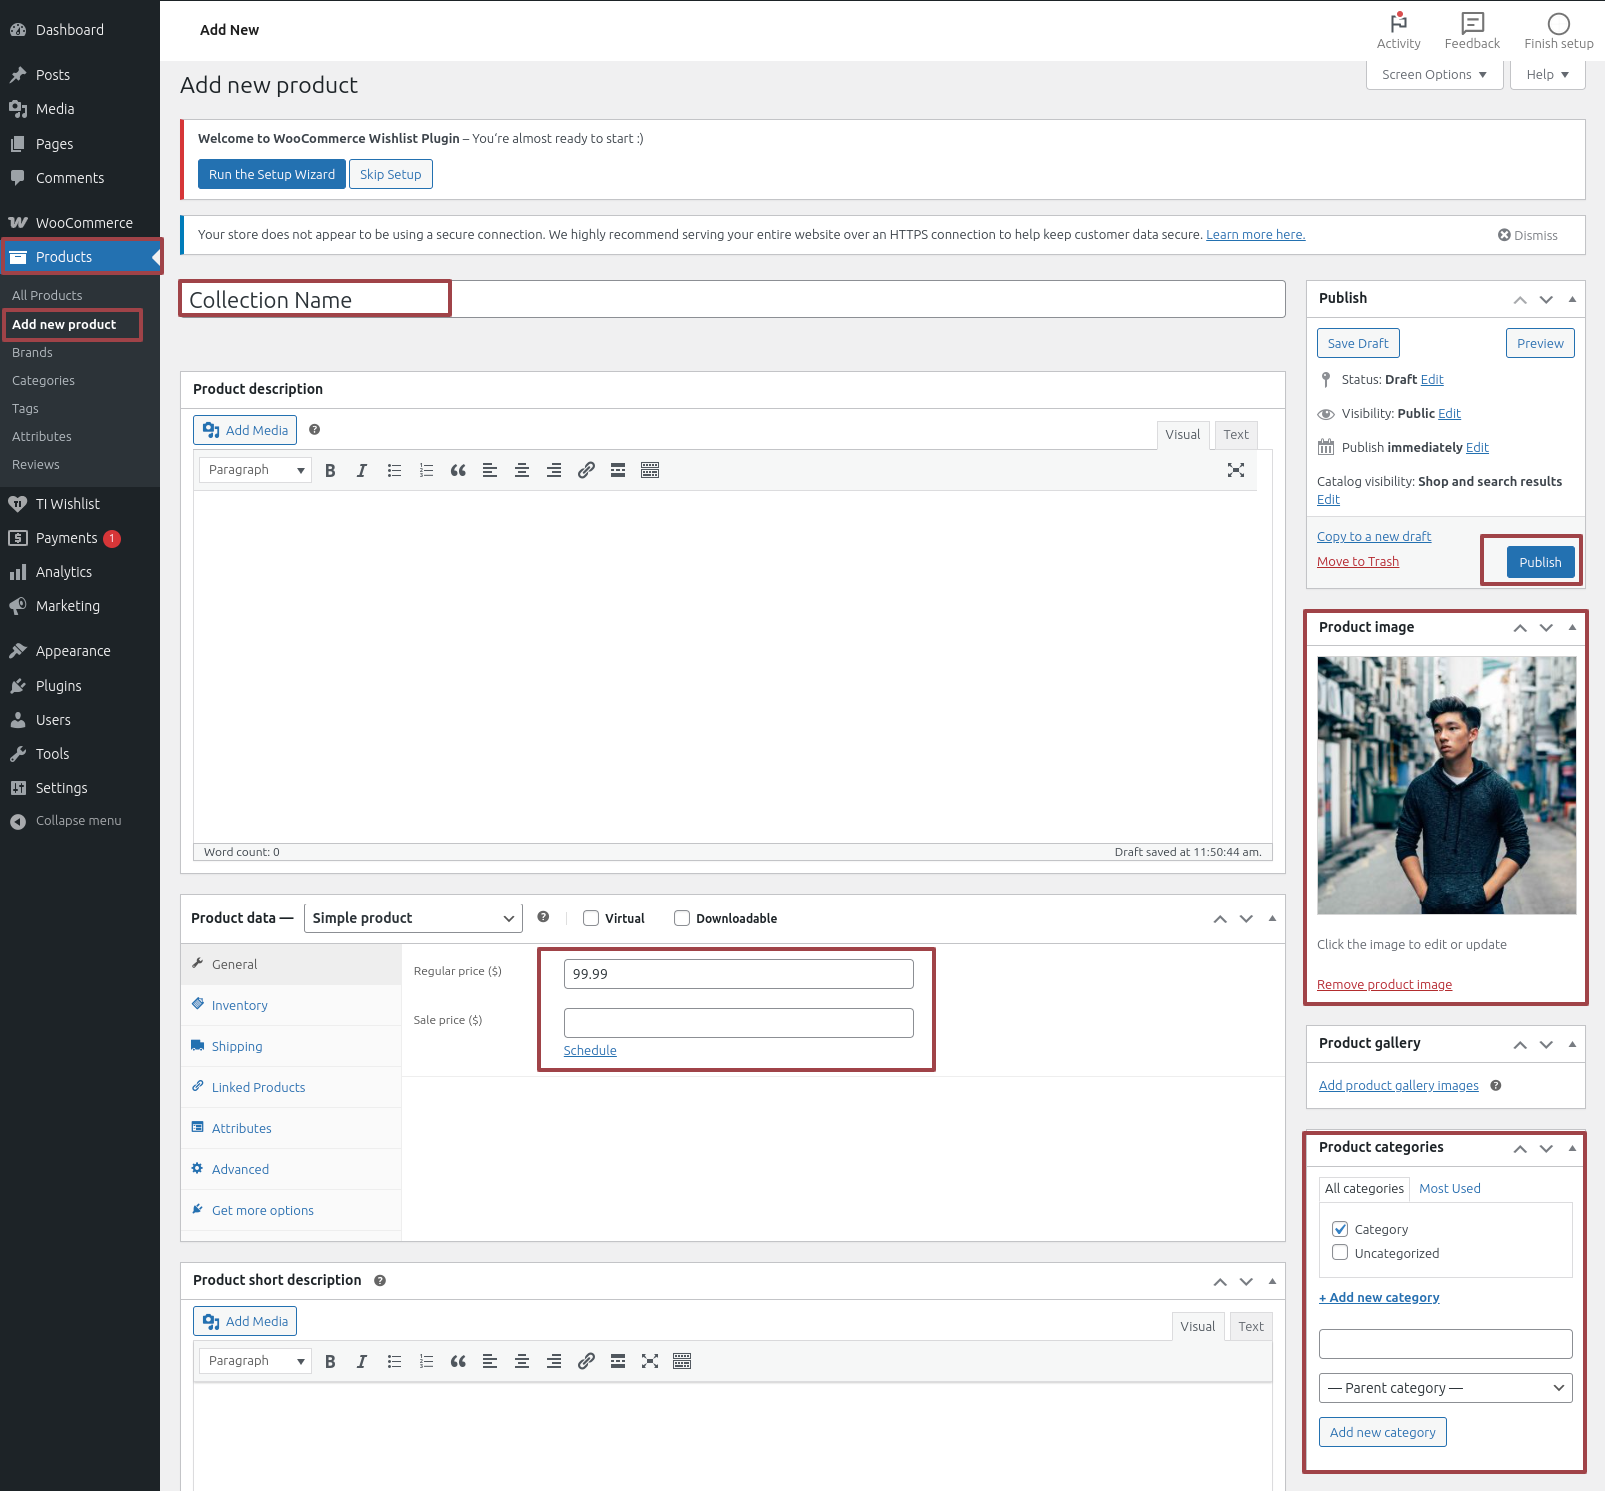
Get started by going to Appearance--->Customize --->Frontpage Settings ---> Product Setting.
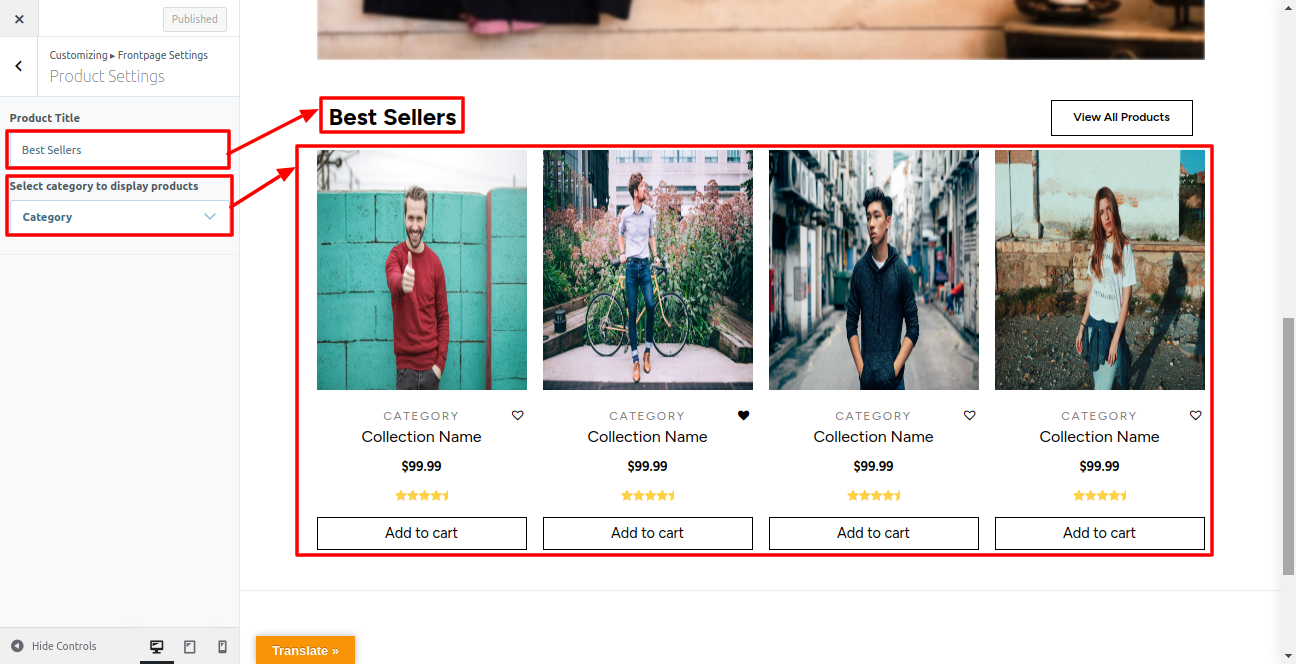
This is how it will initially seem.
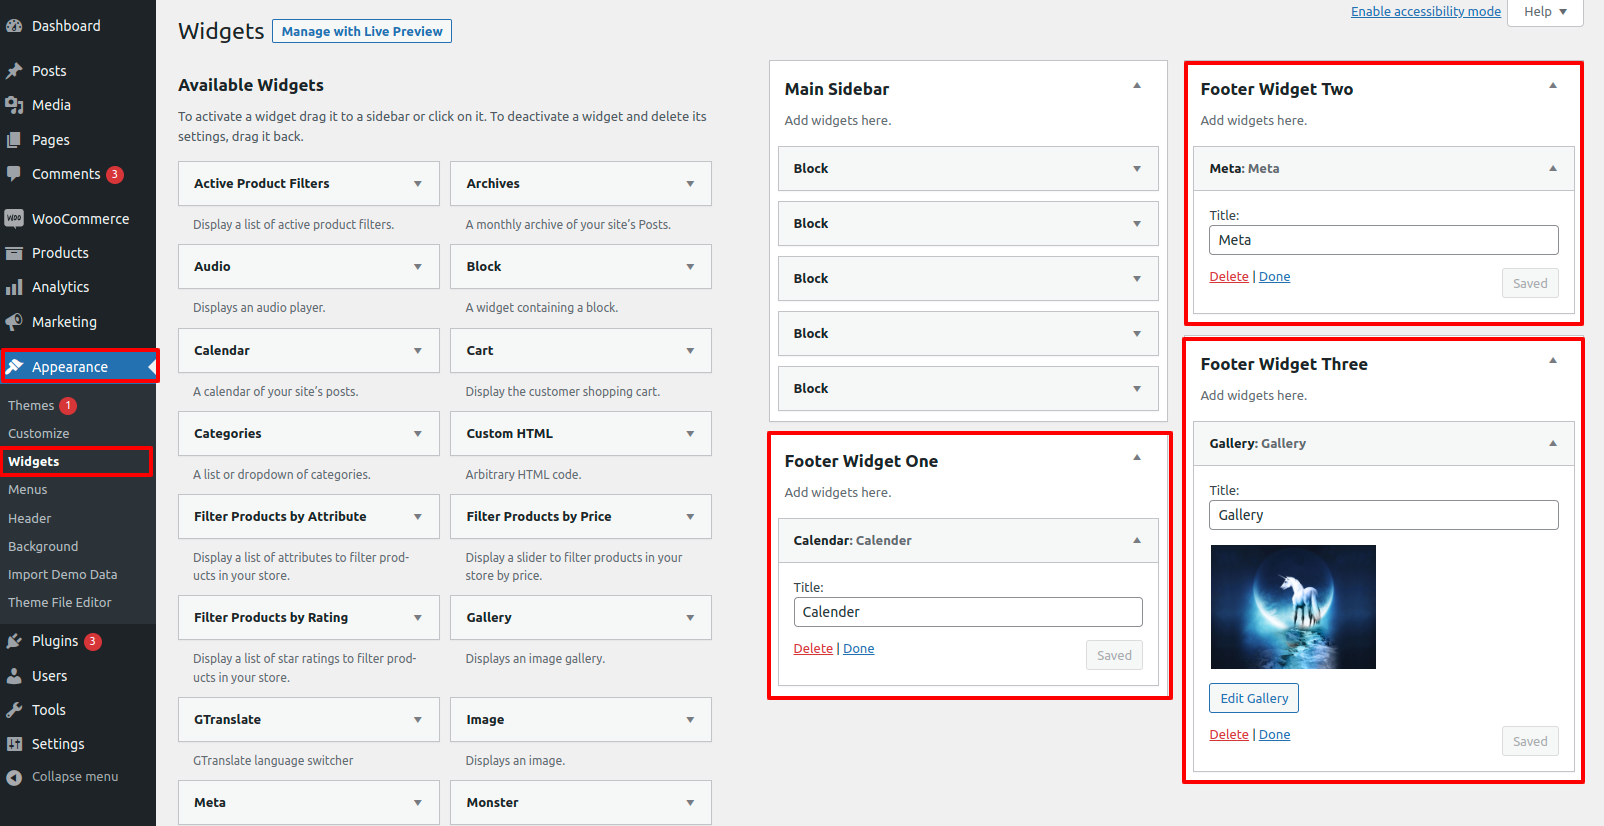
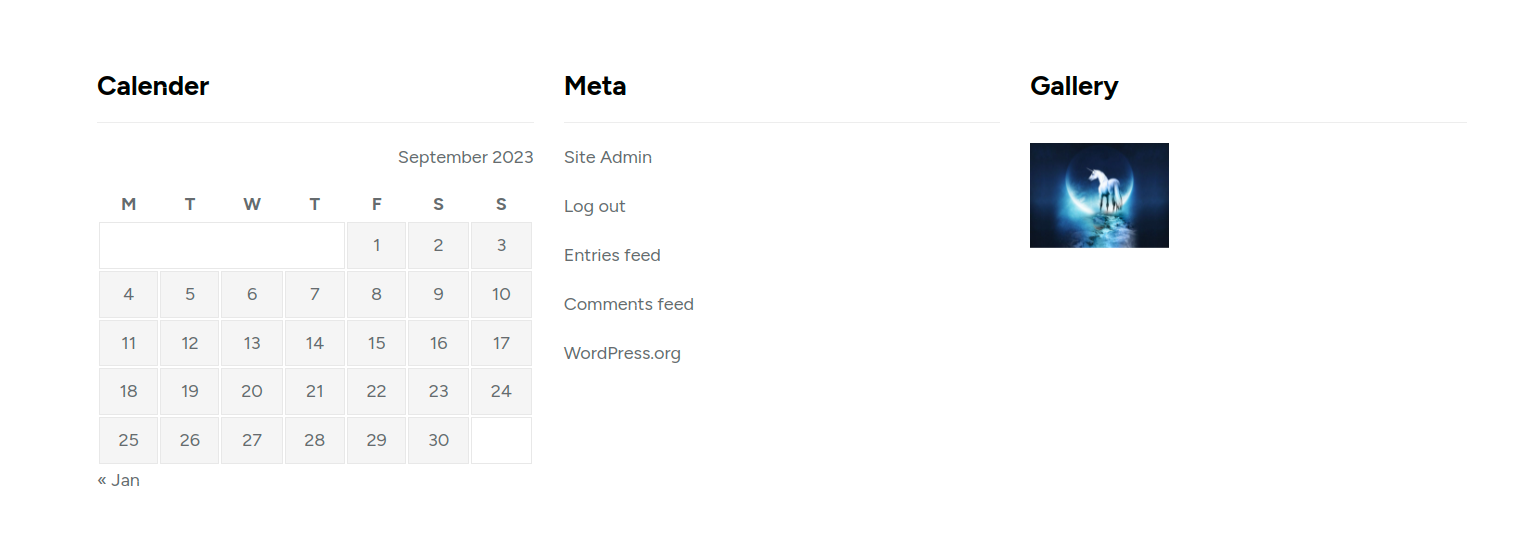
Starting with the Footer Section,
Step 1: Navigate to the Dashboard---> Appearance ---> Widgets.
Go to the appearance section's widgets and choose four footer columns for the tags, gallery, contacts, and logo image, respectively, to build this area.
The widgets part is seen in the figure below.
Navigate to Dashboard --->Appearance---> Widgets. Add New
To access footer widgets, go to Appearance --->Customize --->Widgets---> Footer Widgets One .

This is how it will initially seem.
Starting with the Footer Text section,
Navigate to Appearance--->Customize--->Theme Option---> Footer Settings.
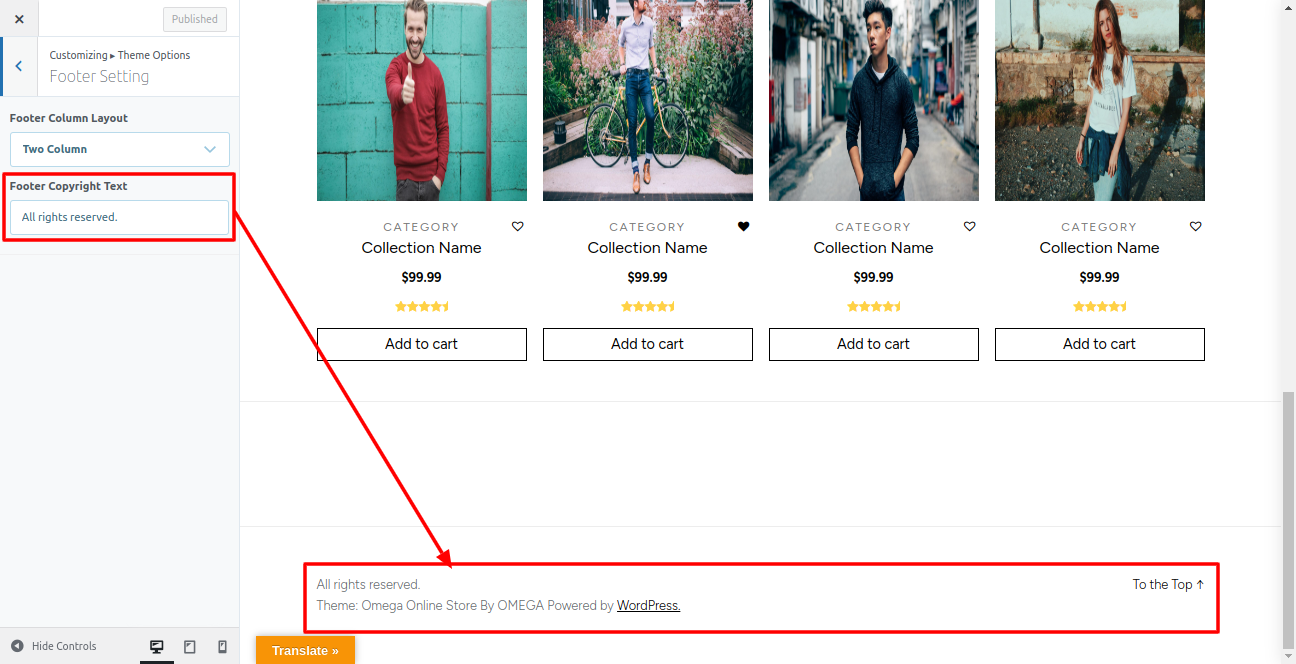
This is how it will initially seem.
